An immersive dance floor inviting self-discovery through movement.
An immersive dance floor inviting self-discovery through movement.
An immersive dance floor inviting self-discovery through movement.
An audiovisual experience where individuals are encouraged to connect more deeply with their senses through movement. The abstracted kinetic visual expression of the installation invites inner self into the outer world. Our user experience is one where the dancer is able to feel synchronization between what they see, hear, and feel. Through achieving this mind-body-spirit harmony, users can relax and unplug from the hustle of daily life.
An audiovisual experience where individuals are encouraged to connect more deeply with their senses through movement. The abstracted kinetic visual expression of the installation invites inner self into the outer world. Our user experience is one where the dancer is able to feel synchronization between what they see, hear, and feel. Through achieving this mind-body-spirit harmony, users can relax and unplug from the hustle of daily life.
Lead Interaction & Experience Designer
Lead Interaction & Experience Designer
An audiovisual experience where individuals are encouraged to connect more deeply with their senses through movement. The abstracted kinetic visual expression of the installation invites inner self into the outer world. Our user experience is one where the dancer is able to feel synchronization between what they see, hear, and feel. Through achieving this mind-body-spirit harmony, users can relax and unplug from the hustle of daily life.
An audiovisual experience where individuals are encouraged to connect more deeply with their senses through movement. The abstracted kinetic visual expression of the installation invites inner self into the outer world. Our user experience is one where the dancer is able to feel synchronization between what they see, hear, and feel. Through achieving this mind-body-spirit harmony, users can relax and unplug from the hustle of daily life.
When planning out the floor, we had two goals:
(1) have a flat surface that with the tactile feel of a real dance studio floor
(2) have a low threshold for pressure to make it accessible for all users
When planning out the floor, we had two goals:
(1) have a flat surface that with the tactile feel of a real dance studio floor
(2) have a low threshold for pressure to make it accessible for all users
To accomplish both these goals, we decided to use velostat, a pressure-sensitive conductive material that feels like a film and is very thin. For the tactile experience, we wanted to use marley, the material found in dance studio floors. After looking into marley, it was out of budget for the project, and we decided to use vinyl to mimic the marley sensation.
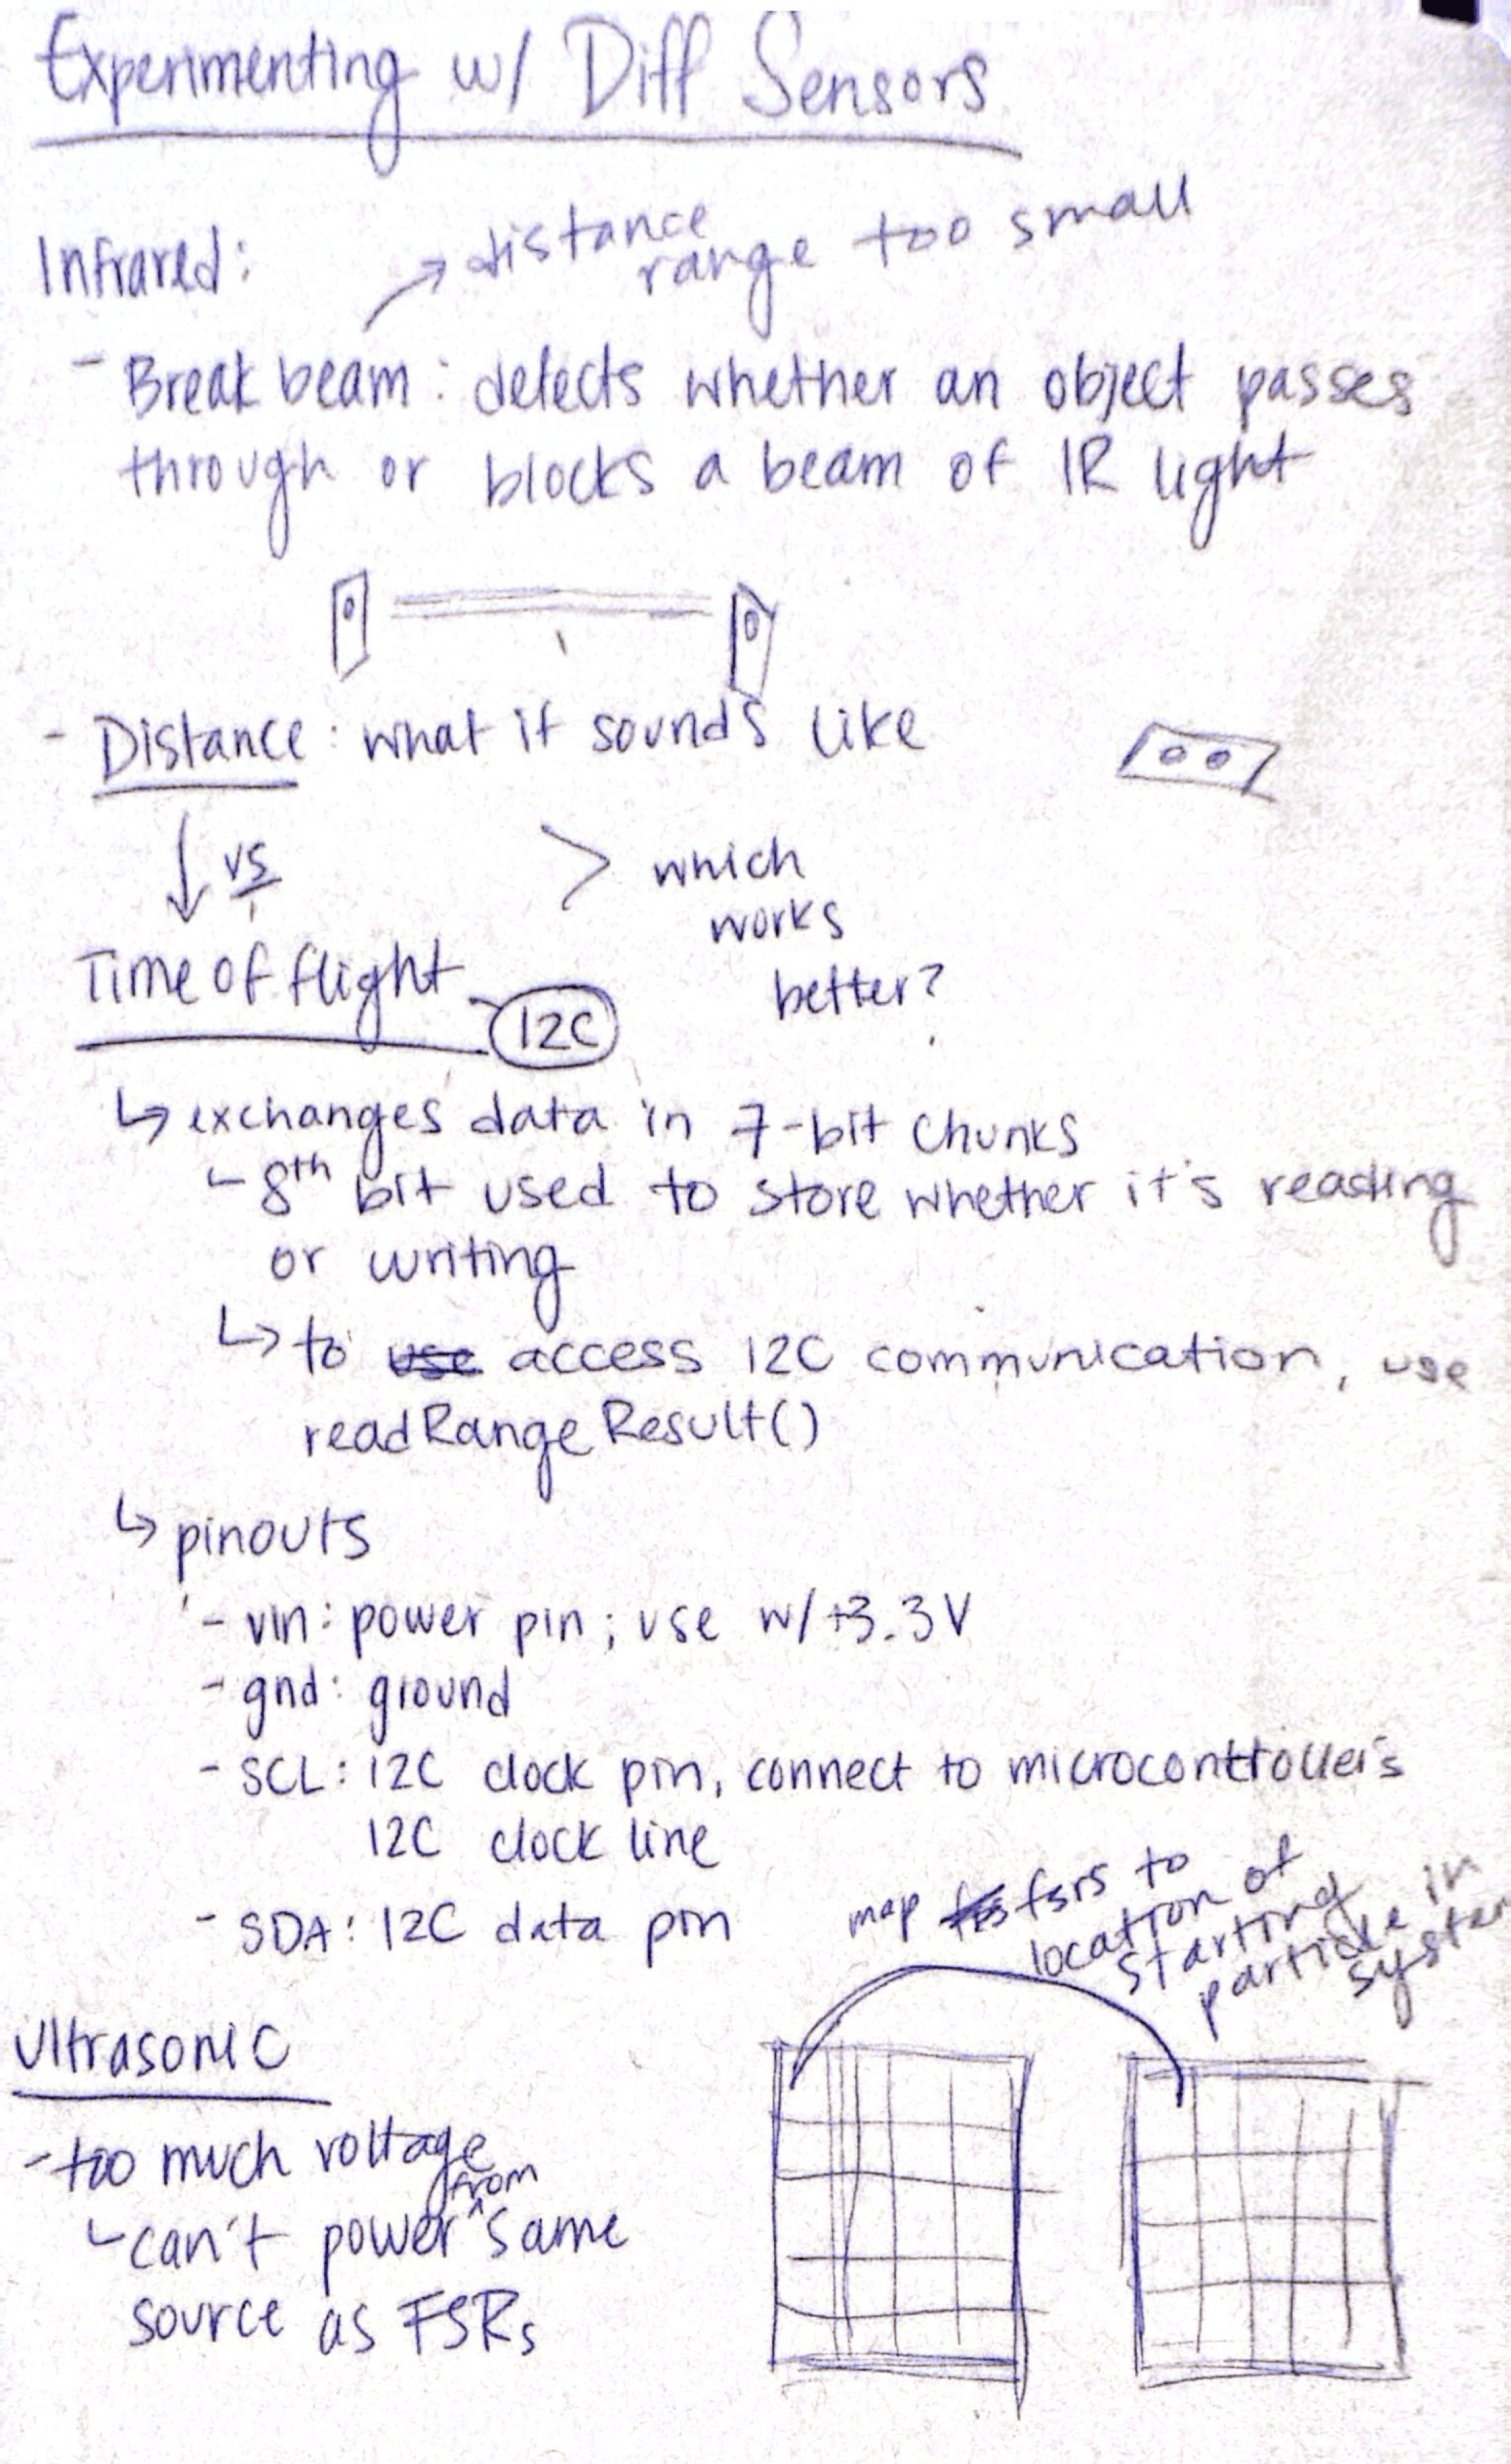
Another key element of making the experience more about dancing was capturing upper body movement. We talked about the relationship of movement via intangible interaction to position on the mat, and how it should be represented in our visual. We decided to test different sensors to capture movement.
Our first prototype was a small square, which we used to test different visuals as well as to learn about programming the velostat.
We mapped the position of our hands on the mat to the particles in p5.js. When we placed our hand somewhere on the mat, a new particle system was created in a corresponding position in the visual.
We tested a couple of different visuals using particle sketches we created over 2 weeks. We tested with the velostat as well as time-of-flight sensors to try to discern an intuitive interaction for our users.
The time-of-flight sensors manipulated color on the particles, while the position on the velostat manipulated the position of the particle system in the p5.js sketch.
When we tried to put everything together before our first round of user testing, everything broke. Working with two serial ports in p5.js proved to be extremely difficult and we lost our progress on the visual. We were also programming the velostat prototype incorrectly, and realized we needed to change our setup with the material. We consulted the O-Mat Instructable and Nasif and Ines for help.Unable to get our prototype working for the user test, we started to reconsider p5.js as the platform for our visuals. We went back to our visual inspiration, where there were several links to TouchDesigner tutorials and visuals. I created a visual from one of these tutorials that mapped to audio data, and set up a “pretend” interaction for our playtest in class, where I received valuable feedback on the visual itself and how it should react to user interaction.
Understanding the logic of how to program the velostat, we moved on to large-scale fabrication. We created a 3’x3’ board with two foam boards, velostat sandwiched in between, and vinyl on top for the tactile feel. We laid 5 rows of electrodes with copper tape on each foam board, orienting them perpendicular to one another to get readings properly.
The way the board works is through one set of digital pins and one set of analog pins. The five rows on the bottom foam board are connected to digital pins 2-6. Each time the code is run (60 times per second), the Arduino sends a high voltage (+3.3V) through each row. The five columns on the top foam board are connected to analog pins, using pulse width modulation to send readings. The velostat in between reads the pressure and ensures conductivity between the two layers. When an intersection of one of the rows and columns is read, it sends a pressure value to the serial monitor.
The way the board works is through one set of digital pins and one set of analog pins. The five rows on the bottom foam board are connected to digital pins 2-6. Each time the code is run (60 times per second), the Arduino sends a high voltage (+3.3V) through each row. The five columns on the top foam board are connected to analog pins, using pulse width modulation to send readings. The velostat in between reads the pressure and ensures conductivity between the two layers. When an intersection of one of the rows and columns is read, it sends a pressure value to the serial monitor.
We needed to refine our Arduino code for programmable data. During user testing, we used raw pressure data as parameters for different effects, but users felt they lacked control over the visuals. For example, standing on the top right corner affected the bloom effect whereas standing in the middle affected the gamma value. The challenge was combining arbitrary pressure values, each read as a different data channel, into something usable in TouchDesigner, which can only input one channel into one parameter.
To address this, we modified the Arduino code to send one value at a time based on a threshold. Using Ines’s awesome calibration code, we calculated baseline pressure values for the velostat to account for its sensitivity. After calibration, the mat sent current pressure values and the difference in pressure. We adjusted the serial monitor to read a single value at a time, which was key for TouchDesigner integration.
Our final code logic sent two values (0.1 to 1) for each row and column if pressure exceeded a threshold. For instance, pressing Row 1, Column 1 sent 0.1, 0.1; Row 3, Column 5 sent 0.5, 1. When no pressure was detected, zeros were sent.
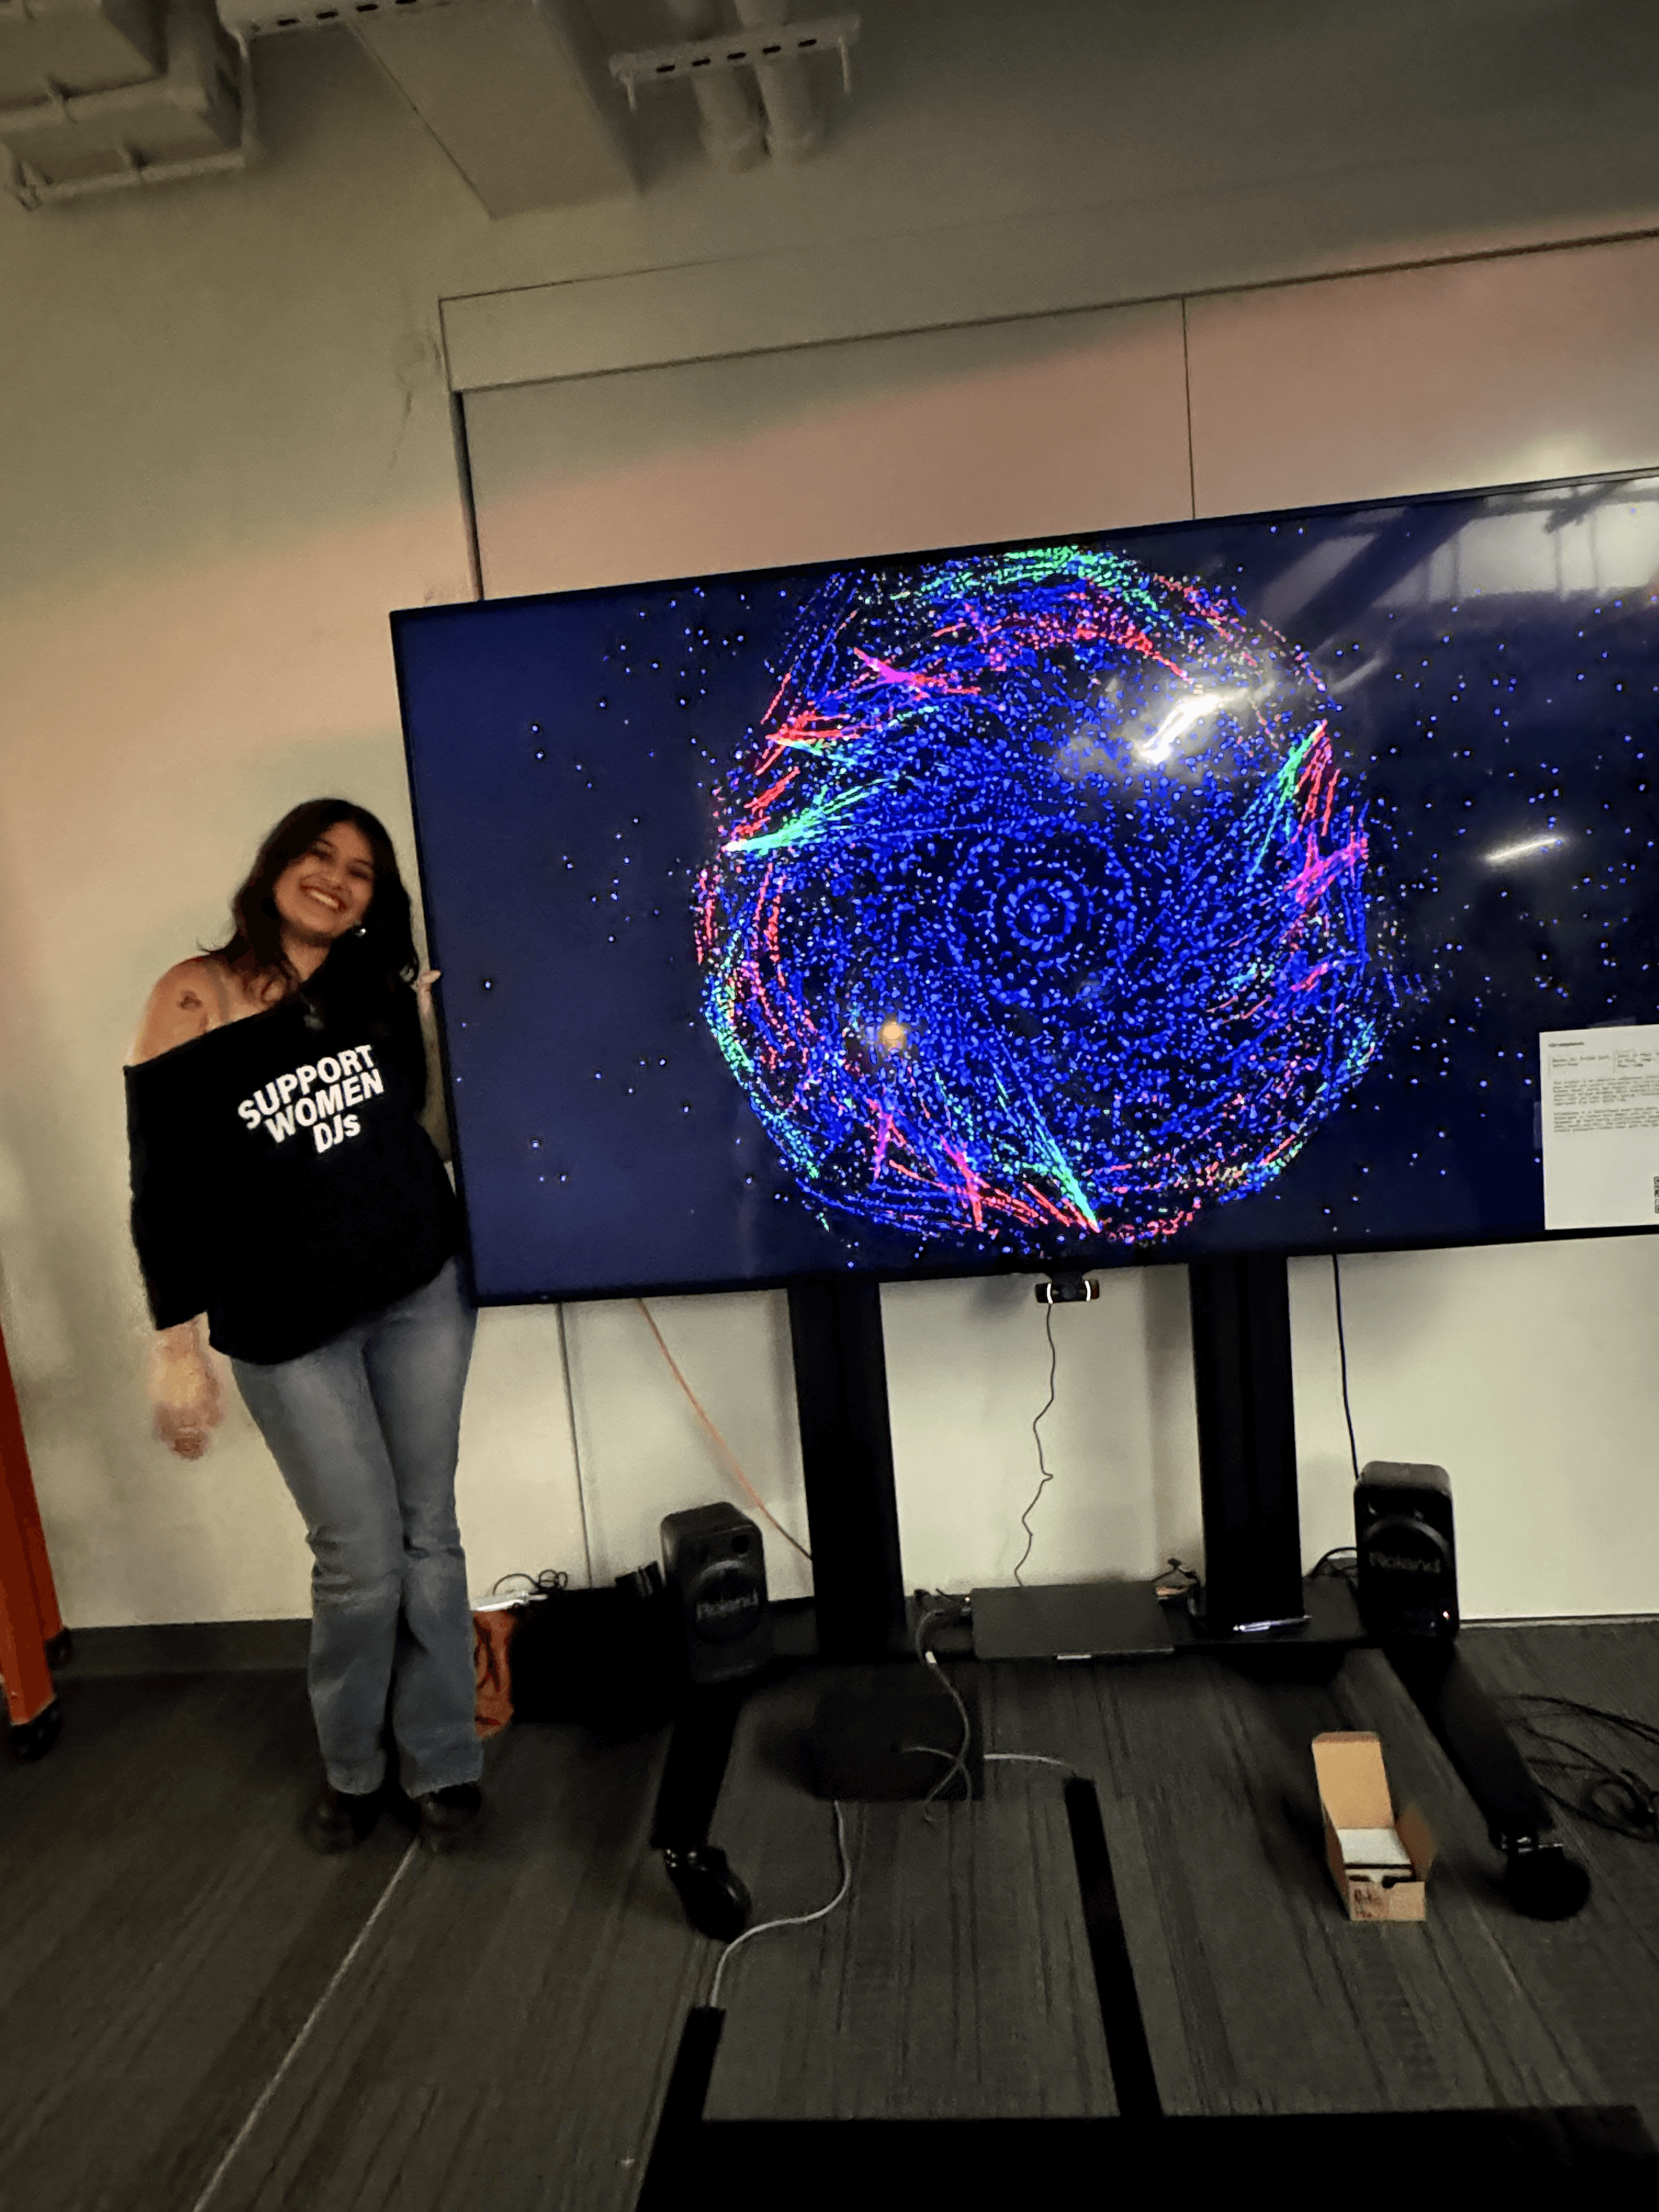
Once we figured out our Arduino code, we moved into TouchDesigner, where we started thinking about programming a visual. We tried to map our grid to the TouchDesigner grid, so that if someone stepped in the top left corner, particles would appear in the top left corner of the visual. This was difficult since TouchDesigner doesn’t use units for its x, y, and z values. We came up with this version and tested it with users:
We realized this visual wasn’t compelling enough to dance, and still might make users feel self-conscious about their movement, which was the opposite of our intention.
I explored possibilities and normalized values to exert different amounts of force on the particles we made in TouchDesigner. Each point would exert different amounts of force in either External Force, Wind, or Turbulence.
The kick drum of the audio would scale up the entire visual, creating a light pulsing effect.
Finally, we used the webcam to create a secondary visual of particles flying in the background to account for upper body movement.
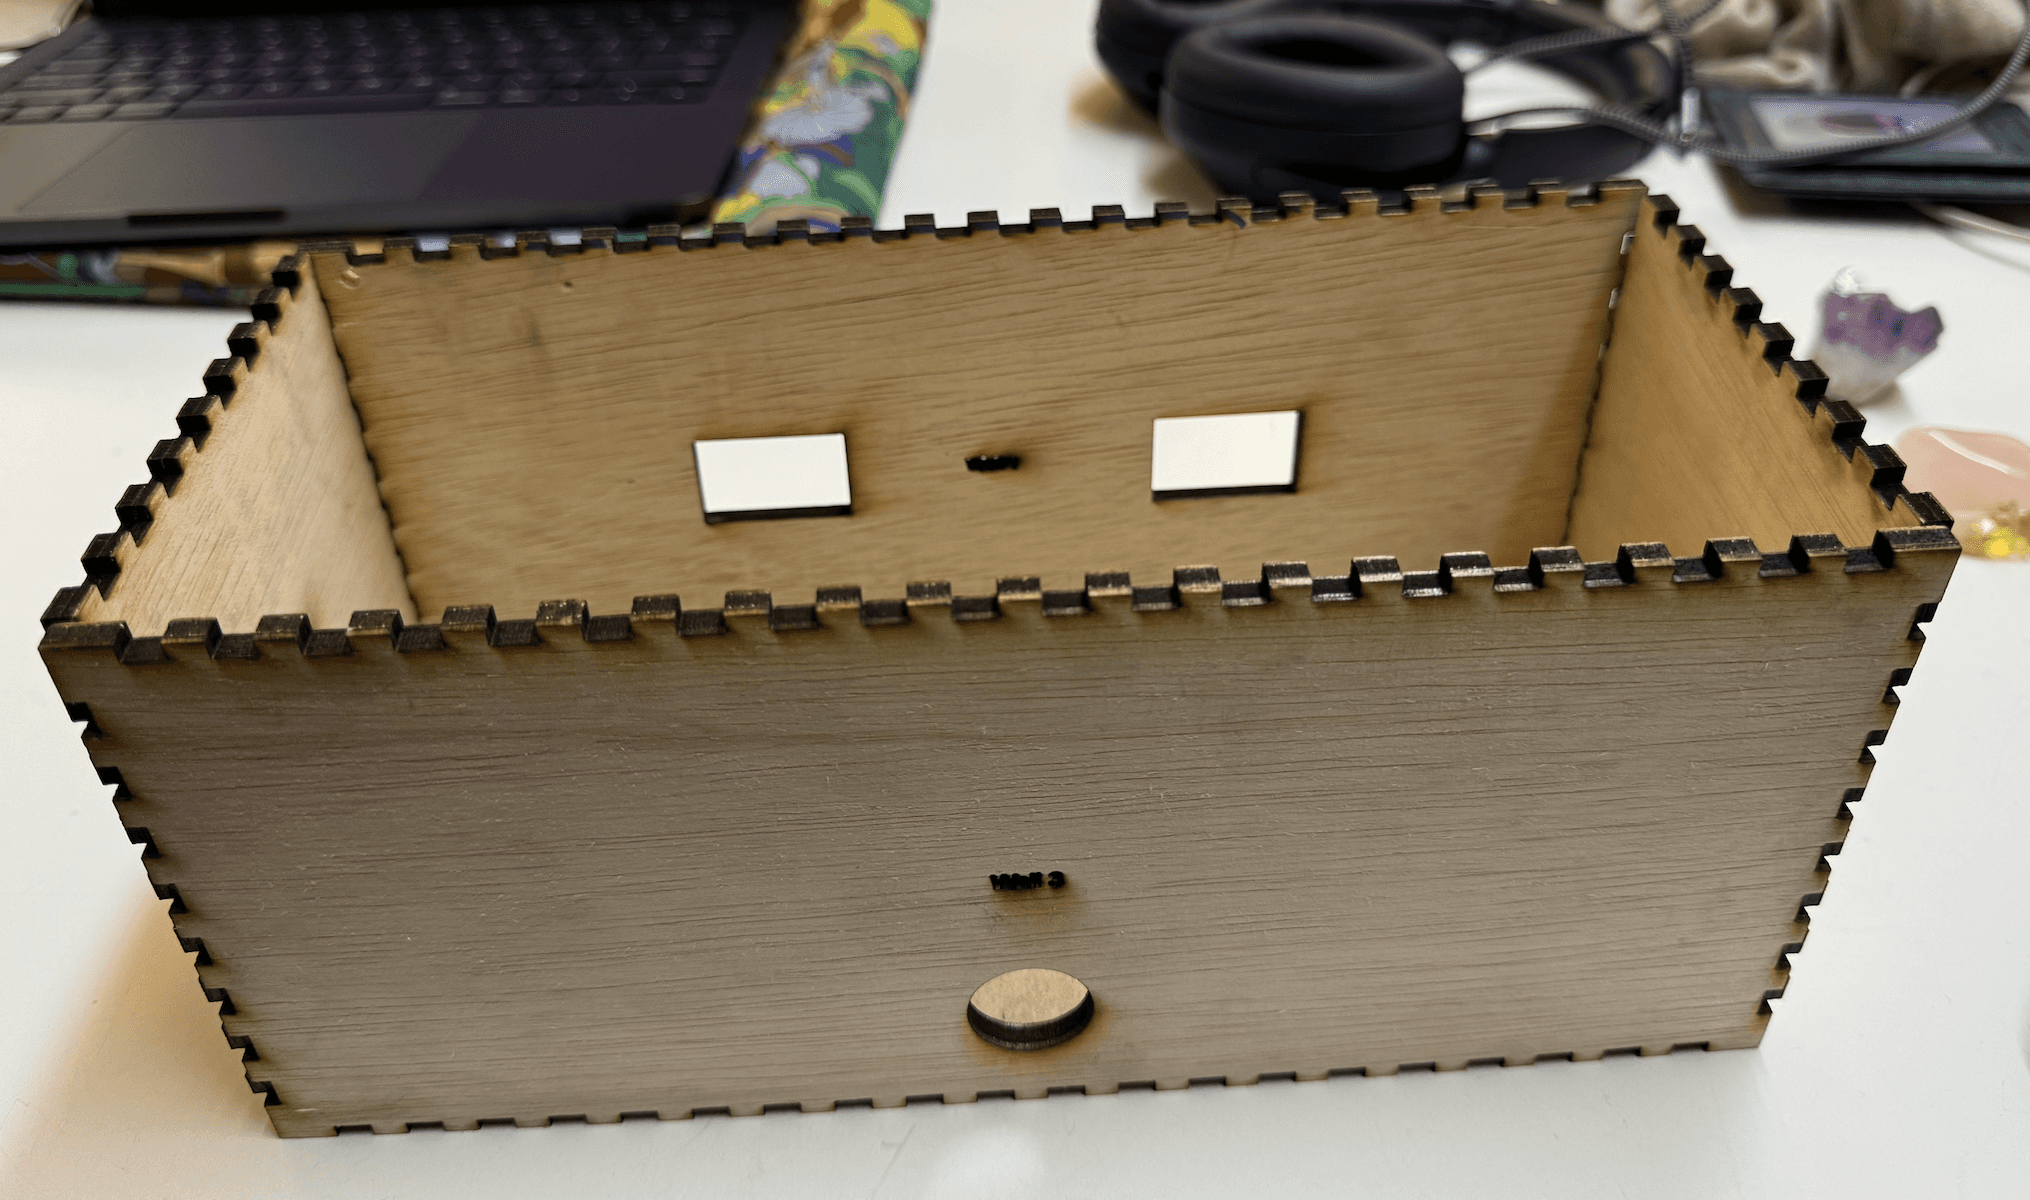
We installed our piece securely to the ground with a frame of duct tape and an additional layer of vinyl. Two speakers framed the front of the mat, and we used our old time-of-flight box to hide our breadboard and wires. Finally, the visual was displayed on a large TV right in front of the mat. We also used the VB Audio Cable Driver to create an internal audio cable that brought audio from Spotify directly into TouchDesigner.
In the future, I’m excited to see where this project can go!
I think there are quite a few possibilities for larger-scale installations, with a bigger mat and multiple screens. I would love to try to utilize immersive sound as well.